Can Window Air Conditioners be Installed Vertically? Expert Guide

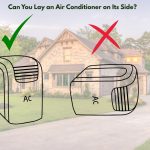
When the summer sun decides to turn up the heat, many of us start dreaming of cool, refreshing air. For decades, the trusty window AC unit has been our go-to solution, a literal breath of fresh air in sweltering times. But what happens when your living space throws a curveball, presenting you with windows that don’t quite play by the conventional rules? That’s where the burning question comes in: can window air conditioners be installed vertically? We’re here to tell you that, for many, the answer is a resounding “yes,” and it opens up a whole new world of cooling possibilities!

So, who exactly might be facing this rather specific predicament? Perhaps you’re living in an older home with charming, yet often challenging, narrow window openings. Maybe you’re in a modern apartment where the architects had a penchant for vertical window designs, leaving you scratching your head about how to beat the heat. Or perhaps you’ve encountered a situation where a standard window simply isn’t an option, and you’re left with a perplexing window opening that defies traditional horizontal AC placement. We get it; necessity is the mother of invention, and sometimes, the usual fixes just won’t cut it. This isn’t just about making an AC fit; it’s about making it work efficiently and safely in an unconventional space.

Ultimately, who stands to gain the most from this guide? Anyone with a narrow window or a vertical window opening who thought their only option was a clunky, inefficient portable unit or, heaven forbid, no AC at all! If you’ve been wondering how to get cool air circulating effectively in a challenging space, or if you’ve ever considered placing your window air conditioner on its side and then thought better of it (and rightfully so, we’ll explain why!), then you’ve come to the right place.

How to Choose the Right Window Air Conditioner

Picking the perfect window air conditioner is a bit like finding the right dance partner – it needs to be a good fit! When you’re considering a vertical installation, this process becomes even more crucial. You can’t just grab any old unit off the shelf and expect it to perform a graceful pirouette into your window.

Factors to Consider When Selecting an AC Unit

When you’re eyeing that new window AC unit, especially for an unconventional setup, there are several key factors we advise you to consider. First and foremost, check if the manufacturer explicitly states that the unit can be installed vertically or if they offer a casement air conditioner. Many standard horizontal units are simply not designed for such a shift in orientation due to their internal components and, crucially, their condensation draining system. Imagine a fish out of water; it just won’t thrive. Similarly, an AC unit designed for horizontal draining will have issues when tipped on its side.

How to Size Your AC for Vertical Installation?

Sizing your AC unit for vertical installation isn’t just about its physical dimensions, though that’s certainly a big piece of the puzzle. It’s about matching the unit’s cooling capacity to the size of the room it will be cooling, while also ensuring it will fit within your specific vertical window opening. We can’t stress this enough: a properly sized unit is the cornerstone of efficient cooling.

Here’s a step-by-step approach we recommend for getting the sizing just right:

  1. Measure Your Space: Grab your trusty tape measure and accurately determine the length, width, and height of the room you intend to cool. Don’t eyeball it; precision is key here! Write these measurements down; they’ll be your North Star.
  2. Calculate Square Footage: Multiply the room’s length by its width to get the square footage. This simple calculation gives you the basic canvas upon which your AC will paint its cooling masterpiece.
  3. Consult a BTU Chart: Once you have the square footage, you can consult a BTU chart, which you can easily find online or in AC unit manuals. These charts provide a general guideline for how many BTUs are needed per square foot. For example, a 150-250 sq ft room typically needs 5,000-6,000 BTUs, while a 350-400 sq ft room might require 8,000 BTUs. Remember, these are guidelines, not commandments etched in stone.
  4. Factor in Variables: Now, for the nuances that can truly make or break your cooling experience! Does the room get a lot of direct sunlight? Are there many windows? Is it poorly insulated? Do you have many heat-generating appliances? These factors can increase the required BTU output. For instance, a sunny room might need an extra 10% in BTUs. Conversely, a heavily shaded room might need slightly less. It’s about being a detective and understanding your room’s unique quirks.
  5. Measure Your Window Opening: This is where the “vertical” aspect truly comes into play. Measure the height and width of your vertical window opening. Pay close attention to the available vertical space and the minimum width required for the unit. Remember, some units, especially casement air conditioners, are designed specifically for these taller, narrower windows, often featuring a slim design. This is absolutely critical because even the best AC unit won’t do you any good if it can’t physically fit into your window. Don’t forget to account for any accordion panels or side fillers that come with the unit; they’ll need room to extend.

Pre-Installation Preparations

Before you even think about lifting that window AC unit, a little preparation goes a long way. Think of it like cooking a gourmet meal; you wouldn’t just start chopping vegetables willy-nilly. A well-prepared workspace and a careful assessment of your window will save you headaches, heartaches, and potentially even trips to the hardware store!

Checking Window Suitability

Not all windows are created equal, and when it comes to installing an AC vertically, some are definitely more suitable than others. This isn’t just about a good fit; it’s about structural integrity and safety.

Here are the steps we recommend for checking your window’s suitability:

  1. Assess the Window Type: Is it a single-hung, double-hung, or a casement window? Traditional double-hung windows, which slide up and down, are generally the most adaptable for vertical AC installation, especially when you find a unit explicitly designed for it, like a casement air conditioner. However, horizontal sliding windows or crank-out casement windows can be more challenging and might require custom modifications or professional help.
  2. Measure the Opening Accurately: This is a crucial step that can’t be rushed. Use a tape measure to get precise measurements of the available vertical space and width of your window opening. Compare these to the dimensions of the AC unit you’ve chosen, including any side panels. Remember, we’re looking for a snug fit, not a squeeze that puts undue stress on the unit or the window.
  3. Inspect the Window Frame: Give your window frame a good once-over. Is it sturdy? Are there any signs of rot, cracks, or damage? A weak or compromised frame won’t be able to adequately support the weight of the window AC unit, which can lead to safety hazards and inefficient cooling. Think of it as the foundation of a house; you wouldn’t build on shaky ground, would you?
  4. Check for Obstructions: Are there any blinds, curtains, or window treatments that will interfere with the installation? What about window locks or security bars? You’ll need to ensure there’s ample clearance for the unit itself and for the proper operation of the window after installation.
  5. Consider the Exterior: Take a peek outside. Are there any trees, awnings, or other obstructions that might block airflow to the outdoor coils of the AC unit? Good airflow is vital for the unit’s efficiency and longevity. Also, think about where the condensation draining will occur; you don’t want water dripping onto a pedestrian walkway or creating a slippery hazard.

How to Clean and Reinforce the Window Frame?

Once you’ve confirmed your window is a suitable candidate, it’s time to roll up your sleeves and get it ready. A clean and reinforced window frame isn’t just about aesthetics; it’s about providing a stable, secure home for your new AC.

Here are the steps we take to ensure your window frame is up to snuff:

  1. Thorough Cleaning: Before anything else, give the window frame a good scrub. Remove any dirt, grime, old paint flakes, or residue. A clean surface ensures that any sealing materials you use will adhere properly, creating a tight seal and preventing air leaks. Think of it as preparing a canvas for a masterpiece.
  2. Inspect for Damage: Look for any signs of rot, splintering, or loose sections in the window frame. Pay particular attention to the window sill, as this area often bears the brunt of weather exposure and can deteriorate over time. Even small imperfections can compromise the structural integrity.
  3. Make Necessary Repairs: If you find any damage, address it before proceeding. This might involve patching small holes with wood filler, reinforcing loose joints with screws, or even replacing sections of rotten wood if the damage is extensive. Don’t cut corners here; a strong foundation is everything.
  4. Reinforce the Sill (If Needed): Since the window sill will bear a significant portion of the AC unit’s weight, we often recommend adding extra support, especially for heavier units or older windows. This could involve adding a sturdy piece of lumber underneath the sill, secured with screws, to provide a more robust platform. It’s like giving your window a strong backbone.
  5. Ensure Level Surface: Use a level to ensure the window sill and frame are perfectly level. An unlevel installation can lead to uneven cooling, increased noise, and improper condensation draining, which can cause water to pool where it shouldn’t. A little tilt can turn into a big problem, so make sure everything is plumb and true.

Gathering Necessary Tools and Materials

A craftsman is only as good as his tools, and installing a window AC unit vertically is no exception. Having all your ducks in a row before you begin will make the process smoother, safer, and far less frustrating. Trust us, there’s nothing worse than being halfway through a project and realizing you’re missing a crucial screw!

Here’s a comprehensive list of what we recommend gathering:

  1. The AC Unit: Of course, you’ll need your chosen window air conditioner itself! Make sure it’s the correct size and type for vertical installation.
  2. Safety Gear: Don’t skimp on safety! We always recommend sturdy work gloves to protect your hands, safety glasses to shield your eyes from debris, and potentially a dust mask if you’ll be drilling or cutting. Better safe than sorry, as they say.
  3. Measuring Tools: A reliable tape measure is essential for accurate measurements of your window opening and the AC unit. A pencil for marking measurements will also come in handy.
  4. Drill and Bits: You’ll need a power drill with appropriate drill bits for pre-drilling pilot holes for screws, especially if you’re working with wood or metal.
  5. Screws and Fasteners: The AC unit should come with its own mounting hardware, but it’s always a good idea to have a variety of wood screws, self-tapping metal screws, and anchors on hand, just in case.
  6. Screwdrivers: A set of Phillips head and flathead screwdrivers will be indispensable for securing brackets and assembling parts.
  7. Level: A level is crucial for ensuring the AC unit is installed perfectly straight, which is vital for proper condensation draining and efficient operation.
  8. Weatherstripping and Foam Insulation: These are your secret weapons for preventing air leaks around the unit. We recommend self-adhesive foam strips and caulk to seal any gaps between the AC and the window frame.
  9. Caulking Gun: If you’re using caulk, a caulking gun will make application a breeze and ensure a smooth, even bead.
  10. Utility Knife or Scissors: For cutting weatherstripping, foam, or any other materials.
  11. Wood Shims: Small wooden shims can be invaluable for leveling the unit or filling small gaps.
  12. Support Brackets: While many vertical AC units come with their own, if you’re adapting a standard unit (which we generally don’t recommend for beginners), you might need to purchase or fabricate additional support brackets to bear the weight of the AC unit and prevent it from falling outwards.
  13. Shop Vacuum or Broom: For a quick cleanup after the installation.
  14. User Manual: Keep the AC unit’s instruction manual handy. It contains specific guidelines for installation and safety that are unique to your model.

Follow these Steps for Vertical Installation

Alright, the moment of truth has arrived! With your window prepped and your tools at the ready, it’s time to tackle the actual installation. This is where precision and patience truly pay off. Remember, we’re not just throwing something into a hole; we’re creating a secure, efficient cooling system for your home.

Clearing the Installation Area

Before we even touch the AC unit, we need to ensure the space is clear and safe. This isn’t just about convenience; it’s about preventing accidents and allowing for smooth movement during what can be a somewhat awkward process.

Here are the steps we recommend for clearing your installation area:

Remove Obstacles:

First things first, clear out any furniture, decorative items, or anything else that might be in the way of the window opening or the immediate surrounding area. You’ll need ample room to maneuver the window AC unit and yourself. Think of it like preparing a stage before the show begins.

Clear the Window Sill:

Make sure the window sill itself is completely free of clutter, dust, or debris. This will be the resting place for your AC unit, and you want it to be as clean and stable as possible.

Protect the Floor:

If you’re working on carpet or a delicate floor, lay down a drop cloth or old blankets. Accidents happen, and a little foresight can save you from a big clean-up or costly repairs.

Ensure Good Lighting:

You’ll need to see what you’re doing clearly, especially when dealing with measurements and small fasteners. If natural light isn’t sufficient, bring in a work lamp. Don’t be left in the dark, literally!

Designate a Tool Zone:

Set up a small, organized area nearby where you can easily access all your tools and materials. This prevents frantic searching and keeps everything within arm’s reach. A little organization goes a long way in keeping your sanity.

How to Secure the Window Brackets?

Most vertical or casement air conditioners come with specific brackets designed to hold the unit securely within the window frame. This is arguably the most critical step, as these brackets are what prevent your unit from taking an unscheduled dive out of the window.

Here are the steps we follow for securing the window brackets:

Consult the Manual:

This is non-negotiable. Every window AC unit is a little different, and the manufacturer’s instructions for bracket placement and fastening are paramount. Don’t try to be a cowboy here; follow the map!

Identify Bracket Placement:

Typically, there will be brackets that attach to the window frame itself, often at the top of the unit and the bottom, providing both vertical and horizontal stability. Some units might also have side brackets. Use your tape measure and pencil to mark the exact locations according to the manual.

Pre-Drill Pilot Holes:

Before driving any screws, always pre-drill pilot holes. This prevents wood from splitting and ensures a clean, secure fastening. The size of the drill bit should be slightly smaller than the diameter of your screws.

Attach the Brackets:

Carefully align the brackets with your marked pilot holes and secure them firmly using the screws provided by the manufacturer. Ensure they are snug and don’t wobble. This is where your screwdrivers or power drill come into play. A tight bracket is a happy bracket!

Verify Level and Alignment:

After attaching the brackets, use your level to double-check that they are perfectly aligned and level. This step is crucial for the proper operation and condensation draining of the AC unit. An unlevel unit can lead to stagnant water and inefficient cooling.

How to Mount the AC Unit Vertically?

This is often the trickiest part, as window AC units can be heavy and awkward. We always recommend having a second person assist you if possible, especially with larger units. Safety is key; don’t be a hero and try to lift more than you can handle.

Here are the steps for mounting your window AC unit vertically:

  1. Careful Lifting: With help, carefully lift the window AC unit, making sure you have a firm grip. Remember to lift with your legs, not your back!
  2. Align with Brackets: Gently slide the unit into the window opening, aligning it with the secured brackets. Many units have grooves or slots that will fit directly onto the brackets. It should feel like it’s settling into place, not forcing.
  3. Secure the Unit to Brackets: Once the unit is in place, you’ll typically need to secure it further to the brackets. This might involve tightening screws or engaging latches that lock the unit onto the brackets. Again, refer to your manual for the exact mechanism.
  4. Extend Side Panels: For most casement air conditioners or units designed for vertical installation, there will be accordion-style side panels that extend to fill the remaining gap between the window AC unit and the sides of the window frame. Gently pull these out until they meet the frame.
  5. Final Adjustments and Leveling: Use your level one last time to ensure the unit is perfectly level both horizontally and vertically. Small adjustments can be made by slightly repositioning the unit within the brackets or using shims if necessary. This step is critical for efficient operation and proper condensation draining.

How to Do Proper Sealing and Insulation?

Once the unit is mounted, the battle isn’t over. A poorly sealed installation is like leaving a window open while your AC is running – a complete waste of energy and money! Proper sealing and insulation are what separate a good installation from a great one.

Here are the steps we take for proper sealing and insulation:

  1. Apply Weatherstripping: Most window AC units come with foam weatherstripping. Apply these strips along the edges of the unit where it meets the window frame and the sash. This creates a barrier against air leaks and helps to dampen vibrations. Don’t be shy; cover every crack and crevice.
  2. Fill Gaps with Foam: For larger gaps between the extended side panels and the window frame, use foam insulation strips. These can be cut to size and firmly pressed into the gaps. They act as a strong thermal and air barrier.
  3. Caulk Exterior Gaps: For any remaining tiny cracks or seams on the exterior of the window frame where it meets the AC unit, apply a bead of exterior-grade caulk. This provides an additional layer of protection against drafts, moisture, and even pests. Be sure to smooth the caulk for a clean, professional finish.
  4. Check the Sash Seal: If you have a double-hung window, ensure that the upper sash is pulled down firmly against the top of the unit or its mounting hardware, and that any included foam strips or brackets effectively seal the gap between the sashes.
  5. Inspect from Indoors and Outdoors: Once you’re done, do a thorough visual inspection from both the inside and outside. Look for any visible gaps or areas where light might be peeking through. If you find any, address them immediately. A tiny gap might seem insignificant, but it can let in a surprising amount of unwanted air.

What are the Electrical and Drainage Considerations?

You’re almost there! But before you plug it in and bask in the cool air, we need to talk about electricity and, yes, that magical liquid called condensation. Getting these right is vital for safety and the longevity of your window AC unit.

Here are the steps we recommend for electrical and drainage considerations:

  • Dedicated Circuit: We always advise plugging your window AC unit into a dedicated electrical outlet, if possible. AC units draw a significant amount of power, and sharing a circuit with other high-demand appliances can trip breakers or, worse, lead to electrical hazards. If you’re unsure about your home’s electrical capacity, it’s always best to consult a qualified electrician. Don’t play fast and loose with electricity!
  • Avoid Extension Cords: Unless absolutely necessary and specifically rated for AC units, avoid using extension cords. They can overheat and pose a fire hazard. If you must use one, ensure it’s a heavy-duty, outdoor-rated cord with a gauge appropriate for the AC unit’s wattage.
  • Verify Proper Grounding: Ensure the outlet you’re using is properly grounded. This is a critical safety feature that protects against electrical shocks. If you have any doubts, have an electrician check it out.
  • Condensation Draining: This is where the vertical installation often differs most from horizontal. Standard units have a drip pan and a drain hole designed for horizontal orientation. When installed vertically, the condensation draining mechanism needs careful attention. Many casement air conditioners are designed with internal baffling or multiple drain holes to accommodate vertical installation. Ensure the unit is slightly tilted outwards (if recommended by the manufacturer) to allow water to drain away freely to the outside.
  • Monitor Initial Drainage: After the first few hours of operation, step outside and check the drainage. Is water flowing freely from the drain hole, or is it pooling inside the unit? If it’s pooling, you might need to slightly adjust the tilt or ensure the drain hole isn’t obstructed. Proper drainage prevents mildew, rust, and potential water damage to your window frame or home. Sometimes, a clogged drain can be the culprit of a big mess.

Safety Measures

When it comes to installing an AC unit, safety should always be your co-pilot. Cutting corners here is simply not an option. We’re talking about heavy machinery, electricity, and the structural integrity of your home. A little vigilance goes a long way in preventing unfortunate incidents.

How to Ensure Structural Stability?

The last thing anyone wants is their expensive window AC unit taking an unexpected dive. Ensuring the structural stability of the installation is paramount for both the longevity of your unit and the safety of everyone around it.

We always advise a thorough check of these areas:

Robust Window Frame:

Your window frame is the unsung hero of the operation. It needs to be sound, without any signs of rot, cracks, or loose components. Think of it as the foundation of a house; you wouldn’t build on shaky ground, would you? A weak frame simply won’t cut the mustard.

Secure Mounting Brackets:

We cannot stress enough the importance of properly installed and tightened mounting brackets. These are the literal backbone of your vertical installation. Double-check that every screw is snug and that the brackets feel absolutely solid. Any wobbling or looseness is a red flag.

Weight Distribution:

Consider the weight of your window AC unit and how it’s being distributed. Vertical units, especially casement air conditioners, are designed with this in mind, but always ensure the weight is evenly supported by the window sill and the mounting hardware. You don’t want undue stress on one part of the frame.

Testing for Movement:

Once everything is installed, give the unit a gentle nudge. It shouldn’t budge! If there’s any significant movement, go back and re-evaluate your bracket installation and window reinforcement. Better to find an issue now than later.

Professional Consultation:

If you have any doubts whatsoever about your window’s ability to support the unit, or if the unit feels unstable, don’t hesitate to call a professional. An HVAC technician or a structural engineer can provide peace of mind and prevent potential disasters.

What Precautions Follow to Avoid Electrical Hazards?

Electricity and water are notoriously bad bedfellows, and an AC unit combines both. Taking precautions against electrical hazards is not just a recommendation; it’s a non-negotiable rule.

Here’s what we consider essential:

Grounded Outlet:

Ensure your window AC unit is plugged into a properly grounded electrical outlet. A grounded outlet provides a safe path for electricity in case of a fault, preventing shocks. If your home has older, ungrounded outlets, it’s time to call an electrician.

Dedicated Circuit Awareness:

As we’ve mentioned before, AC units draw a lot of power. While not always possible, plugging into a dedicated circuit minimizes the risk of overloading circuits and tripping breakers. If your lights dim when the AC kicks on, it’s a sign your circuit might be overloaded.

No Damaged Cords or Plugs:

Before plugging in your unit, inspect the power cord and plug for any fraying, cuts, or bent prongs. A damaged cord is an accident waiting to happen. If you spot any damage, do not use the unit.

Water Away from Wiring:

Ensure that the condensation draining system is working perfectly and that no water is dripping onto any electrical components or wiring, either inside or outside the unit. Water and electricity are a dangerous mix, a recipe for disaster.

Professional Wiring Checks:

If you’re undertaking any custom wiring or have concerns about your home’s electrical system, always bring in a licensed electrician. Don’t try to be a hero with electrical work; it’s a job for the pros.

How to Prevent Water Leakage?

Water leakage from an AC unit is a common, yet entirely preventable, headache. Not only can it damage your walls and floors, but it can also create a breeding ground for mold and mildew.

We focus on these points to keep things dry:

  • Proper Tilt for Drainage: Most window AC units, especially those designed for vertical installation like casement air conditioners, require a slight tilt outwards to ensure proper condensation draining. This allows the collected water to flow freely out of the unit and away from your home. We’re talking about a gentle slope, not a dramatic angle.
  • Clear Drain Pan and Holes: Periodically check the drip pan and the drain holes for any blockages from debris, leaves, or even insect nests. A clogged drain is a surefire way to get a puddle inside. A small brush or a blast of air can often clear these blockages.
  • Effective Sealing: As we discussed, a tight seal around the window frame and the unit is crucial. This isn’t just for energy efficiency; it also prevents rain or outside moisture from seeping in around the unit, which can be mistaken for internal leakage.
  • Monitor for Pooling Water: After installation and during operation, regularly check for any pooling water around the base of the unit, both inside and outside. If you see water accumulating, it’s a sign that the drainage isn’t working as it should and needs immediate attention.
  • Address Internal Leaks Promptly: If water appears to be leaking from within the unit itself, beyond the normal condensation drip, it could indicate a more serious internal issue like a clogged condensate line or a faulty pump. In such cases, it’s best to call an HVAC professional.

Steps by Steps Procedure for Safe AC Unit Placement

Where you place your window AC unit (even vertically!) isn’t just about fitting it into a hole. It’s about optimizing its performance, ensuring safety, and maximizing your comfort.

Here are our top tips for safe placement:

  1. Unobstructed Airflow: Ensure that both the indoor and outdoor coils of the window AC unit have completely unobstructed airflow. Indoors, don’t place furniture directly in front of the unit, as this will block the cool air. Outdoors, make sure there are no bushes, awnings, or other objects too close that could restrict the hot air being exhausted. Good airflow is the lifeblood of an efficient AC.
  2. Above Eye Level for Safety (If Possible): While not always feasible with vertical window installations, if you have the option, placing the unit slightly higher can help keep it out of reach of small children or pets and reduce the risk of accidental bumps.
  3. Consider Sun Exposure: If possible, try to install the unit in a window that doesn’t receive direct, scorching afternoon sun. Direct sunlight on the outdoor coils can reduce efficiency. If it’s unavoidable, consider adding an awning or shade structure (without impeding airflow) to mitigate the impact.
  4. Accessibility for Maintenance: Think about future maintenance. Can you easily access the filters for cleaning? Can a professional access the exterior components if needed? Don’t make it a puzzle to perform routine checks.
  5. Away from High-Traffic Areas: While the unit needs to be near a window, avoid placing it in a doorway or a high-traffic walkway where it could become a tripping hazard or be accidentally knocked. It’s about blending function with everyday living.

Benefits of Vertical Installation

So, we’ve walked through the ins and outs of getting that AC unit nestled snugly in your vertical window. But why go through all this effort? Well, the perks are more than just a cool breeze; they extend to efficiency, aesthetics, and making the most of every inch of your living space. It’s truly a win-win situation for those with unconventional window setups.

How to Enhance Cooling Efficiency?

You might think cramming an AC into a narrow window would somehow hinder its ability to perform, but quite the opposite can be true when done correctly. A properly installed casement air conditioner or a unit specifically designed for vertical placement can actually be a powerhouse of cool air.

Here’s how we see enhanced cooling efficiency playing out:

  • Optimized Airflow Direction: Many casement air conditioners are designed to project air along the length of the room, rather than directly out into a small area. This can lead to better air circulation and a more evenly cooled space. It’s about distributing that cool air more effectively, like a well-aimed fan.
  • Reduced Air Leaks: With the meticulous sealing and insulation we discussed, a vertically installed unit can often achieve a tighter seal than a haphazardly installed horizontal unit. Fewer air leaks mean less wasted energy and more of that precious cool air staying where it belongs – inside your home.
  • Targeted Cooling: In some long, narrow rooms, a vertically installed unit can be strategically placed to target specific areas or create a more direct path for cool air to flow, leading to quicker and more efficient temperature drops.
  • Less Interference with Window Function: Unlike some horizontal installations that can completely block the function of a window, a slim, vertical unit might allow for partial operation of the other window sash, contributing to better overall ventilation when the AC isn’t in use.
  • Lower Energy Bills: Ultimately, when a unit is operating efficiently, it doesn’t have to work as hard to maintain your desired temperature. This directly translates into lower energy consumption and a lighter hit to your wallet each month. Who doesn’t love that?

Maintenance Tips

Congratulations, you’ve successfully installed your vertical AC unit! But the journey doesn’t end there. Just like a well-oiled machine, your window AC unit needs a little TLC to keep running smoothly, efficiently, and for years to come. Regular maintenance isn’t a chore; it’s an investment in your comfort and your wallet.

How to Clean and Filter Maintenance?

The single most important maintenance task for any window AC unit is keeping those filters clean! A clogged filter is the arch-nemesis of efficiency, causing your unit to work harder, consume more energy, and ultimately, cool less effectively.

Here are the steps we champion for filter and general cleaning:

  1. Read Your Manual First: Always, always, always consult your specific unit’s manual for filter removal and cleaning instructions. Some units have slide-out filters, others might clip in, and the recommended cleaning method can vary.
  2. Regular Filter Checks (Every 2-4 Weeks): We recommend checking your filter every two to four weeks during the cooling season, more frequently if you have pets or suffer from allergies. A quick visual inspection will tell you if it’s dirty.
  3. Filter Cleaning (Rinse or Vacuum): Most modern window AC unit filters are washable. Gently slide it out, and rinse it under lukewarm water until the water runs clear. For heavily soiled filters, a mild detergent can be used. Allow it to air dry completely before reinstalling. If it’s a disposable filter, simply vacuum it gently or replace it as needed. Never put a damp filter back in!
  4. Clean the Front Grille: While the filter is out, take a soft cloth or a vacuum with a brush attachment and gently clean the front grille of the unit. Dust and grime can accumulate here, restricting airflow and looking rather unsightly.
  5. Coil Cleaning (Annual or Bi-Annual): This is a bit more involved. Over time, dust and debris can build up on the evaporator (indoor) and condenser (outdoor) coils, hindering heat exchange. We suggest a gentle vacuuming with a brush attachment. For more stubborn grime, specialized coil cleaning sprays are available, but always disconnect power first and wear gloves. If you’re unsure, call an HVAC professional. This is crucial for optimal cooling and longevity.
  6. Clear the Condensate Drain Pan: Ensure the condensation draining pan is clear of any standing water or sludge. A small amount of water might be normal, but excessive pooling indicates a potential clog in the drain line. A quick flush with a small amount of diluted bleach (check your manual first!) can prevent mold and mildew growth.

Troubleshooting Common Issues

Even with the best maintenance, things can sometimes go awry. Don’t despair! Many common AC issues can be easily diagnosed and even fixed with a little know-how. We believe in empowering you to tackle minor hiccups.

Here are the steps for troubleshooting common issues:

No Power / Unit Not Turning On:

  • Check the Plug: Is it fully inserted into the outlet? Sometimes, a loose plug is the simplest answer.
  • Circuit Breaker: Has the circuit breaker tripped? If so, reset it. If it trips repeatedly, there might be an electrical issue requiring a professional.
  • Unit Reset Button: Many modern window AC units have a reset button on the plug or the unit itself. Press it firmly.

Not Cooling Effectively:

  • Dirty Filter: This is the number one culprit! A clogged filter severely restricts airflow. Clean or replace it.
  • Blocked Airflow: Are furniture, curtains, or external obstructions blocking the intake or exhaust vents? Clear them away.
  • Temperature Setting: Is the thermostat set to a low enough temperature? Is it on “Fan Only” mode instead of “Cool”?
  • Coil Buildup: If the coils are visibly dirty, a thorough cleaning might be needed (as discussed above).
  • Room Size Mismatch: Is the unit too small for the room? Re-check your BTU calculations.

Water Leaking Inside:

  • Improper Tilt: Is the unit level or slightly tilted outwards for proper condensation draining? Adjust if necessary.
  • Clogged Drain: Is the drain pan or drain hole clogged with debris? Clear it out.
  • Frozen Coils: This can happen if the filter is very dirty, or the fan speed is too low. Turn off the AC, let it defrost, and then restart after addressing the underlying issue.

Strange Noises:

  • Vibrations: Ensure the unit is securely installed and the window frame is not vibrating against it. Tighten any loose screws.
  • Debris in Fan: Sometimes, a small twig or leaf can get caught in the outdoor fan. Disconnect power and carefully remove it.
  • Fan Motor Issues: If it’s a grinding or squealing noise, it might indicate an issue with the fan motor or its lubricating oils, which often requires professional attention.

Unit Cycles On and Off Too Frequently (Short Cycling):

  • Oversized Unit: If your unit is too powerful for the room, it will cool the space too quickly and then shut off, only to turn back on shortly after. This leads to poor dehumidification.
  • Thermostat Placement: Is the thermostat sensor too close to a heat source or in direct sunlight? This can fool it into thinking the room is warmer than it is.
  • Dirty Coils: Dirty coils can cause the unit to overheat and shut down prematurely.

Remember, if you’ve tried these troubleshooting steps and the issue persists, or if you’re uncomfortable performing any of these tasks, don’t hesitate to call a professional HVAC technician. Sometimes, a problem is beyond a DIY fix, and it’s always better to call in the cavalry than to cause further damage.

Energy Efficiency and Cost Savings

Beyond the immediate comfort, a well-chosen and properly installed window AC unit – especially a vertically oriented one – can be a surprisingly frugal friend. We’re not just talking about keeping your cool; we’re talking about keeping your cash in your pocket and doing a little something for Mother Earth while you’re at it.

Exploring Energy-Efficient Models

When you’re looking at different window air conditioners, the terms EER and SEER pop up like old friends. These aren’t just fancy acronyms; they’re your guideposts to saving money on your electricity bill.

  • EER (Energy Efficiency Ratio): This measures how efficiently an AC unit uses electricity to cool, calculated by dividing the cooling output (BTUs) by the power input (watts). A higher EER means greater efficiency. Think of it as miles per gallon for your AC – the more miles, the better! For vertical installations, looking for casement air conditioners with high EER ratings is always a smart move.
  • SEER (Seasonal Energy Efficiency Ratio): While EER is a snapshot at a specific operating condition, SEER gives you a broader picture of efficiency over an entire cooling season. It takes into account varied temperatures and operating conditions. Units with a higher SEER rating tend to be more expensive upfront, but they pay for themselves over time through lower electricity consumption. It’s an investment that keeps on giving.
  • Energy Star Certification: Keep an eye out for the Energy Star label. This government-backed symbol indicates that a product meets strict energy efficiency guidelines. Choosing an Energy Star-certified window AC unit means you’re getting a model designed to save energy and reduce greenhouse gas emissions. It’s like having a seal of approval for smart energy choices.
  • Smart Features: Modern energy-efficient models often come with programmable timers, remote controls, and even Wi-Fi connectivity, allowing you to control your unit from your smartphone. These features empower you to optimize cooling schedules, so you’re not cooling an empty house, leading to significant savings. It’s about being clever with your comfort.

How to Calculate Cost Savings?

You’ve picked an energy-efficient model, but how does that translate into actual dollars and cents? We love a good calculation to put things into perspective!

Here are the steps to help you calculate potential cost savings:

  1. Find Your Unit’s Wattage: This information is usually found on the unit’s energy guide label or in its specifications.
  2. Estimate Daily Run Time: How many hours a day do you anticipate running your AC? Be realistic.
  3. Calculate Daily Kilowatt-Hours (kWh) Used:
  • (Wattage / 1000) * Daily Run Time = Daily kWh
  • Example: A 500-watt unit running 8 hours a day: (500 / 1000) * 8 = 4 kWh
  1. Find Your Electricity Rate: This is typically listed in cents per kWh on your electricity bill.
  2. Calculate Daily Cost:
  • Daily kWh * Electricity Rate = Daily Cost
  • Example: 4 kWh * $0.15/kWh = $0.60
  1. Estimate Monthly/Seasonal Cost: Multiply the daily cost by the number of days you’ll use it in a month or season.
  2. Compare Old vs. New: Do this calculation for your old unit (if you have one) and your potential new, energy-efficient model. The difference is your potential savings! While it might seem like small change at first, these pennies add up to dollars over the cooling season, making a real dent in your utility bill. It’s surprising how quickly those savings can accumulate.

What are the Environmental Benefits of Window AC Unit?

Beyond the personal financial gains, choosing an energy-efficient window AC unit, especially one installed correctly to maximize its efficiency, also has a positive ripple effect on the environment. It’s a win-win-win scenario.

Reduced Carbon Footprint: Less energy consumption directly translates to fewer greenhouse gas emissions from power plants. By being energy-conscious, you’re playing a part in combating climate change. Every little bit truly helps, like a drop in the ocean contributing to a rising tide.

Conservation of Resources: Using less electricity means less demand on natural resources like coal, natural gas, and water, which are often used to generate power.

Lowered Strain on the Grid: During peak demand times (often hot summer afternoons), the electrical grid can become stressed. Energy-efficient appliances help to reduce this strain, contributing to a more stable and reliable power supply for everyone.

Reduced Refrigerant Leakage: While not directly tied to energy efficiency, choosing newer, reputable brands and ensuring proper installation can reduce the likelihood of refrigerant leaks, which contain potent greenhouse gases.

Promotes Sustainable Living: By making conscious choices about your appliance purchases and usage, you’re not just saving money; you’re actively participating in a more sustainable way of life. It’s a small step that can inspire bigger changes.

Comparison with Horizontal Installation

Now, for the age-old question: can window air conditioners be installed vertically or is horizontal always king? It’s not a matter of one being inherently superior, but rather choosing the right tool for the right job. Think of it as picking between a screwdriver and a wrench; both are useful, but for different tasks.

Pros and Cons of Vertical vs. Horizontal Installation

Let’s break down the advantages and disadvantages of each installation method, especially when it comes to window AC units.

Vertical Installation (Often with Casement Air Conditioners):

Pros:

  • Space Saving: This is the big one! Ideal for narrow window openings or when vertical space is abundant but horizontal width is limited. It frees up more of the window for light and view.
  • Aesthetics: Often looks sleeker and less obtrusive in tall, narrow windows, blending better with the window frame‘s existing lines.
  • Targeted Cooling: Can sometimes offer better airflow patterns in long, narrow rooms.
  • Solves a Niche Problem: The perfect solution for vertical window types that can’t accommodate standard horizontal units.

Cons:

  • Limited Unit Selection: Fewer models are designed specifically for vertical installation compared to horizontal units. This means less choice and potentially higher prices.
  • Installation Complexity: Can be more complex to install, especially if you’re adapting a unit or dealing with challenging window types, requiring more careful sealing and support.
  • Drainage Concerns: Requires meticulous attention to condensation draining to ensure water doesn’t pool due to altered orientation. Improper drainage can lead to rust and leaks.
  • BTU Limitations: While there are powerful vertical units, the sheer variety of very high BTU horizontal units still outnumbers them.

Horizontal Installation (Standard Window AC Unit):

Pros:

  • Wider Unit Selection: The market is flooded with horizontal units, offering a vast array of sizes, features, and price points.
  • Easier Installation (Generally): Most standard window AC units are designed for relatively straightforward horizontal installation, often fitting well into traditional double-hung windows.
  • Established Drainage: The condensation draining system is typically designed for horizontal operation, making proper drainage more intuitive.
  • Cost-Effective: Due to higher production volumes and competition, horizontal units often have a lower upfront cost.

Cons:

  • Requires Ample Window Width: Not suitable for narrow window openings or vertical window types.
  • Blocks More Window Space: A horizontal unit can significantly block natural light and your view, especially in smaller windows.
  • Bulkier Appearance: Can often look more like a “box” sticking out of your window, which some may find less aesthetically pleasing.
  • Limited by Window Type: Simply won’t work in a vertical window or a casement window without significant (and often ill-advised) modifications.

Which Option Is Right for You?

The million-dollar question, isn’t it? Choosing between vertical and horizontal installation boils down to a few key considerations, and honestly, your window opening is probably calling the shots!

Window Type is King?

If you have a vertical window or a narrow window that simply won’t accommodate a traditional horizontal unit, then a vertical solution, likely a casement air conditioner, is your clear winner. Trying to force a square peg into a round hole, or in this case, a horizontal unit into a vertical space by placing it on its side, is generally a bad idea due to internal components and critical condensation draining issues.

Available Space:

Assess the actual vertical space and horizontal width you have. If you have plenty of width in a standard double-hung window, a horizontal unit will likely be more cost-effective and easier to install. However, if the window opening is predominantly tall and thin, the vertical option becomes compelling.

Aesthetics and View:

How important is maintaining your view and natural light? If preserving as much of your window opening as possible is a priority, a sleek vertical unit will often be a more attractive choice than a bulky horizontal one that dominates the frame.

Budget:

While horizontal units generally have a lower entry price, remember to factor in potential energy savings from a well-fitted, efficient vertical unit if that’s what your window demands. Sometimes, spending a little more upfront saves a lot down the line.

Ease of Installation:

If you’re a DIY enthusiast, a standard horizontal installation is often more straightforward. Vertical installations, particularly for adapted units, can be more challenging and might warrant professional help if you’re not comfortable. However, for dedicated casement air conditioners, the process is typically well-documented and manageable.

Ultimately, we believe the best option is the one that fits your unique window situation, provides efficient cooling, and makes you happy. There’s no one-size-fits-all answer, but by understanding the nuances of each, you can make an informed decision and chill out in comfort!

Legal and Regulatory Considerations

Before you go full steam ahead with your vertical AC installation, it’s wise to pump the brakes and consider the finer points of local regulations. Ignoring these can lead to fines, forced removal, or even disputes with neighbors. It’s always better to be safe than sorry and ensure your cool air doesn’t come with a side of legal hot water.

Do I Need Permits and Building Codes?

“Red tape,” some might call it, but permits and building codes are there for a reason: safety and structural integrity. Don’t skip this step!

Local Ordinances:

We always recommend checking with your local municipal building department. Many cities and counties have specific regulations regarding the installation of window AC units, especially if they protrude significantly from the building or require modifications to the window frame. They might require a permit, especially for larger units or commercial properties.

Structural Impact:

For heavier window AC units or if you’re considering significant alterations to your window opening for a vertical installation, a building permit might be required to ensure the structural integrity of your home isn’t compromised. The last thing you want is a compromised window frame due to oversight.

Electrical Codes:

If you plan to run new electrical wiring or make any changes to your home’s electrical system to accommodate the AC unit, you will almost certainly need an electrical permit and the work must be done by a licensed electrician to ensure compliance with local electrical codes. Safety first, always!

Inspection Requirements:

If a permit is required, be prepared for inspections by building officials to ensure the installation meets all safety and structural requirements. It’s a small hurdle for peace of mind.

What are the Noise and Aesthetic Restrictions to Follow?

Nobody wants to be “that neighbor” with the noisy, eyesore AC unit. While cooling your home is your prerogative, living in harmony with your community is also important.

Noise Ordinances:

Many residential areas have noise ordinances, especially regarding loud machinery operating late at night. While most modern window AC units are relatively quiet, some older or larger models can be quite boisterous. Check your local noise restrictions to avoid complaints. The lower the decibel (dB) rating, the better, especially for bedrooms.

Aesthetic Guidelines:

In some historic districts, homeowner associations (HOAs), or even certain neighborhoods, there might be regulations regarding the external appearance of buildings. This could include restrictions on how far window AC units can protrude from the window opening or even requirements for them to be obscured from public view.

Visual Impact: Consider the visual impact of your vertical installation from the outside. While a sleek casement air conditioner might look fine, a standard unit awkwardly crammed into a vertical window might stand out like a sore thumb. Think about how it impacts your home’s curb appeal and your neighbors’ views.

Customizing Your Installation

So, you’re ready to get that cool air flowing vertically! While the core installation principles remain, there are always ways to add a personal touch and enhance your unit’s performance and integration into your home. Think of it as tailoring a suit to fit you perfectly.

How to Use Brackets and Mounting Options?

While your window AC unit will come with standard mounting hardware, sometimes a little ingenuity with additional brackets can make all the difference, especially when you’re dealing with a challenging vertical window or want extra security.

Here are the steps for exploring and utilizing brackets and mounting options:

  1. Assess Manufacturer Brackets: First, thoroughly examine the brackets provided by the manufacturer. Are they designed for vertical installation? Do they seem robust enough for your specific window type and the weight of your window AC unit? Don’t be afraid to read the fine print.
  2. External Support Brackets: For heavier units or for added peace of mind, especially if the window sill isn’t as sturdy as you’d like, consider adding external support brackets. These are typically L-shaped or triangular brackets that attach to the exterior wall below the window opening and provide additional support for the unit’s weight. Ensure they are properly rated for the weight and secured into wall studs. This is like adding an extra layer of insurance.
  3. Anti-Vibration Pads: To reduce noise and vibration, we often recommend placing anti-vibration rubber pads or strips between the window AC unit and the window frame, particularly at contact points. These small additions can make a big difference in reducing rattling.
  4. Security Brackets: If security is a concern, you can find specific security brackets that prevent the AC unit from being pushed inward from the outside. These are often made of sturdy metal and add an extra layer of protection.
  5. Custom Fabrication (Professional Only): In very unique narrow window scenarios where off-the-shelf solutions don’t quite fit, a professional fabricator or experienced handyman might be able to create custom mounting solutions. This is a higher-cost option but can be invaluable for truly challenging installations.

How to Incorporating Smart Technology?

We live in a smart world, and your AC unit can certainly join the party! Integrating smart technology can elevate your comfort, boost energy efficiency, and even add a touch of modern convenience to your vertical installation.

Here are the steps for incorporating smart technology into your AC setup:

  1. Smart Plugs: The easiest entry point into smart AC control! A smart plug allows you to control your window AC unit remotely via your smartphone or voice assistant (like Google Assistant or Amazon Alexa). You can schedule the AC to turn on before you arrive home, or turn it off if you forgot. It’s like having a remote control that works from anywhere.
  2. Wi-Fi Enabled Units: Many newer window AC units, including some casement air conditioners, come with built-in Wi-Fi connectivity. This offers more advanced control through a dedicated app, often including detailed energy usage monitoring, various cooling modes, and integration with other smart home platforms.
  3. Smart Thermostats (External): While most window AC units have their own thermostat, an external smart thermostat can sometimes provide more accurate temperature readings (especially if the unit’s sensor is near a heat source) and more advanced programming options. Some can even integrate with humidity sensors for better comfort.
  4. Geofencing: Some smart AC systems or plugs offer geofencing capabilities. This means your AC can automatically turn on when you’re a certain distance from home and turn off when you leave, ensuring you’re always coming back to a comfortable space without wasting energy. It’s like your house knows when you’re coming home.
  5. Voice Control Integration: Once connected to a smart hub or direct Wi-Fi, you can control your window AC unit with simple voice commands. “Hey Google, turn on the living room AC” – convenience at its finest!

Maintenance and Troubleshooting (Revisited)

We’ve touched on this before, but it’s such a cornerstone of responsible AC ownership that it deserves its own dedicated section to really drive the point home. Think of maintenance as your AC’s annual check-up and troubleshooting as its visit to the doctor when it’s feeling under the weather. Both are crucial for its longevity and your comfort.

Preventive Maintenance Guide

An ounce of prevention is worth a pound of cure, especially with your window AC unit! Regular, proactive maintenance keeps small issues from becoming big, costly problems.

Here’s our comprehensive preventive maintenance guide:

  • Clean Filters Religiously (Monthly or Bi-Weekly): We can’t stress this enough. Dirty filters choke your unit, making it work harder and costing you money. Remove, rinse, and thoroughly dry washable filters or replace disposable ones regularly. If you have pets or allergies, do it bi-weekly during peak season.
  • Inspect and Clean Coils (Annually): At least once a year, preferably before the cooling season, inspect both the evaporator (indoor) and condenser (outdoor) coils. Gently vacuum away any dust or debris. For stubborn grime, use a specialized coil cleaner, ensuring the unit is unplugged first. Clean coils mean efficient heat exchange.
  • Clear the Condensate Drain (Seasonally): Ensure the condensation draining pan and drain hole are free of blockages. Flush with a mild bleach solution (if compatible with your unit) to prevent mold and mildew growth. A clogged drain is a common source of leaks and bad odors.
  • Check Seals and Weatherstripping (Seasonally): Before and after the cooling season, inspect all the seals, weatherstripping, and foam around the window frame and the unit itself. Replace any cracked, worn, or missing pieces to prevent air leaks and maintain efficiency. This also keeps out bugs and drafts.
  • Tighten Loose Screws (As Needed): Periodically check for any loose screws on the unit’s casing or mounting brackets. Vibrations from operation can sometimes loosen fasteners. A quick tightening can prevent rattling and ensure stability.
  • Inspect Power Cord and Plug: Look for any signs of wear, fraying, or damage on the power cord and plug. If you see any, discontinue use and consult a professional.
  • Clear Outdoor Debris: Ensure that nothing is blocking the outdoor side of the unit, such as leaves, branches, or overgrown shrubbery. Unobstructed airflow is vital for the unit’s efficiency and to prevent overheating.

Common Issues and Their Fixes

Even with the best preventive care, sometimes your AC unit will throw a curveball. Knowing how to diagnose and potentially fix common issues can save you a service call and get you back to cool comfort quickly.

Unit Not Cooling/Weak Airflow:

Fix: Dirty filter is the prime suspect. Clean or replace it. Also, check for anything blocking the intake or exhaust vents. Ensure the temperature setting is low enough and the unit is on “Cool” mode.

Water Leaking (Inside or Outside):

Fix: Most often due to improper tilt (for vertical installations, check that it’s tilted slightly outwards for condensation draining), or a clogged drain pan/hose. Clear any blockages. If coils are frozen, turn off the unit to defrost.

Unusual Noises (Rattling, Buzzing):

Fix: Check for loose screws on the casing or mounting brackets. Ensure the unit is sitting securely in the window opening and not vibrating against the window frame. Sometimes, debris (like a leaf) can get into the fan. If the noise is grinding or squealing, it could be a fan motor issue requiring professional attention.

Unit Cycles On and Off Too Frequently (Short Cycling):

Fix: If the unit is too large for the room, it will short cycle. If the filter is very dirty, it can also cause this. Ensure the thermostat sensor isn’t in direct sunlight. If it’s a constant issue, consider getting a professional to assess if the unit is properly sized.

Unit Smells Musty/Moldy:

Fix: This is usually due to mold or mildew growth in the drain pan or on the coils due to stagnant water. Clean the drain pan thoroughly and use a coil cleaner. Ensure proper condensation draining.

When to Call a Professional

While we encourage DIY fixes for minor issues, there are times when it’s simply best to call in the cavalry. Knowing when to wave the white flag and pick up the phone can save you from bigger headaches, costly mistakes, or even dangerous situations.

Just like choosing a car, selecting a window AC unit means navigating a landscape of brands, each with its own reputation and features. When you’re specifically looking for a vertical installation, the field narrows a bit, but there are still excellent options out there. We’ve done our homework to give you a head start.

Environmental Impact

In our modern world, we’re all becoming more acutely aware of our environmental footprint. Your decision on an AC unit isn’t just about personal comfort; it also has broader implications for our planet. We believe in making informed choices that benefit both your home and the Earth.

The Carbon Footprint of Window AC Units

Every time you flip on your window AC unit, it draws electricity, and in many places, that electricity is generated by burning fossil fuels, which releases greenhouse gases like carbon dioxide into the atmosphere. This contributes to climate change.

Here’s how we break down the carbon footprint:

  • Energy Consumption: This is the biggest factor. The more electricity your AC unit consumes, the larger its carbon footprint. Older, inefficient models are particularly notorious for being energy hogs, guzzling electricity like there’s no tomorrow.
  • Refrigerant Emissions: Window AC units use refrigerants (like hydrofluorocarbons or HFCs) to cool. While contained within the unit, leaks can occur over time, releasing these potent greenhouse gases. Some HFCs have a global warming potential thousands of times greater than CO2. This is why proper maintenance and leak prevention are crucial.
  • Manufacturing and Disposal: The production of the unit itself, from mining raw materials to assembly, consumes energy and generates emissions. Similarly, improper disposal at the end of its life can release harmful chemicals and contribute to landfill waste.
  • Transportation: The journey of the AC unit from the factory to your home also adds to its carbon footprint through fuel consumption.

How to Choose Eco-Friendly Options?

Fortunately, you have the power to mitigate your AC unit’s environmental impact by making smart, eco-conscious choices. It’s about being part of the solution, not adding to the problem.

Here’s how we encourage choosing eco-friendly options:

  • Opt for High EER/SEER Ratings & Energy Star: This is the most impactful step. Choosing an Energy Star certified window AC unit with a high EER or SEER rating means it’s designed to use less electricity, directly reducing your carbon footprint. It’s the easiest way to make a big difference, similar to driving a fuel-efficient car.
  • Proper Sizing: An oversized unit will “short cycle,” meaning it turns on and off frequently, which wastes energy. An undersized unit will run constantly and struggle to cool. Proper sizing, as we discussed, ensures the unit operates efficiently, reducing wasted energy.
  • Regular Maintenance: Keep your filters clean, coils clear, and ensure proper condensation draining. A well-maintained unit runs more efficiently, consuming less energy and potentially extending its lifespan, delaying the need for a new unit.
  • Consider Natural Ventilation: On milder days, embrace natural ventilation. Open windows, use fans, and create cross-breezes to cool your home without engaging the AC. Sometimes, the simplest solution is the best one.
  • Responsible Disposal: When your old window AC unit finally bites the dust, don’t just toss it in the trash. Many communities have specific programs for recycling old appliances, which ensures refrigerants are safely removed and materials are salvaged. This prevents harmful chemicals from escaping into the environment and reduces landfill waste.
  • Look for Lower Global Warming Potential (GWP) Refrigerants: While less common in standard window AC units currently, the HVAC industry is moving towards refrigerants with lower GWP. Staying informed about these advancements can influence your future purchasing decisions.

Conclusion

So, there you have it – a comprehensive journey through the world of vertically installed window air conditioners. We’ve peeled back the layers, from the initial question of can window air conditioners be installed vertically to the intricate dance of installation, maintenance, and even environmental impact. We’ve shown you that yes, for many, this unconventional approach isn’t just possible; it’s often the smartest, most efficient, and most aesthetically pleasing path to beating the heat in challenging spaces.

So, are you ready to make the switch? We encourage you to roll up your sleeves, consult this guide, and confidently transform your challenging window into a source of refreshing relief. The cool, crisp air awaits!

FAQ: Your Burning Questions Answered

Can any window be used for vertical installation?

Not quite. While many double-hung windows can be adapted, and some window AC units are specifically designed for vertical placement (often called casement air conditioners), windows that crank out (like traditional casement windows) or slide horizontally are generally unsuitable without significant, and often ill-advised, modifications. It truly depends on the design of your specific window opening and the type of unit you’re installing.

Are there Energy Star-rated vertical AC units?

Absolutely! Just like their horizontal counterparts, many vertically oriented window air conditioners, especially casement air conditioners, are Energy Star certified. When choosing a unit, always look for this label, as it signifies that the appliance meets strict energy efficiency guidelines, which translates to lower electricity bills and a smaller environmental footprint for you.

Do I need a permit for vertical installation?

It depends on your local municipality and homeowner’s association (HOA) rules. Many areas do not require a permit for standard window AC unit installations. However, if you plan to make significant structural modifications to your window frame, run new electrical wiring, or if your unit protrudes excessively, a permit might be necessary. Always check with your local building department and HOA before you begin to avoid any unexpected issues.

How do I fix water drainage issues?

Water drainage is critical for any window AC unit, especially one installed vertically. If you’re experiencing issues, first ensure the unit is slightly tilted outwards to allow for proper condensation draining. Check the drain pan and drain hole for any clogs from debris or mold and clear them. If coils are frozen, defrost the unit. Persistent issues might indicate a deeper problem, like a faulty pump or a more complex clog, and could warrant a call to an HVAC professional.

Are there environmentally friendly options for vertical AC units?

Yes! The most impactful eco-friendly choice is selecting a highly energy-efficient model with a high EER or SEER rating, preferably Energy Star certified. Additionally, proper installation and regular maintenance (like cleaning filters and coils) ensure the unit runs efficiently, reducing its energy consumption and carbon footprint. When it’s time for disposal, ensure your old unit is recycled responsibly.

How can I dispose of my old unit responsibly?

You shouldn’t just toss your old window AC unit in the regular trash. Appliances contain refrigerants and other materials that can be harmful to the environment if not disposed of properly. Many municipalities have special collection programs for appliances, or you can contact local recycling centers or scrap metal yards that accept AC units. Some retailers might even offer haul-away services when you purchase a new unit. Responsible disposal ensures proper handling of refrigerants and recycling of materials.

Leave a Comment